Tutorial · free for Windows 10 and 11
Save your own presets
If you keep choosing the same format, quality and size, save them once as your own preset. It sits next to the built-in presets like Email and Instagram, and on the Quick Convert wheel too.
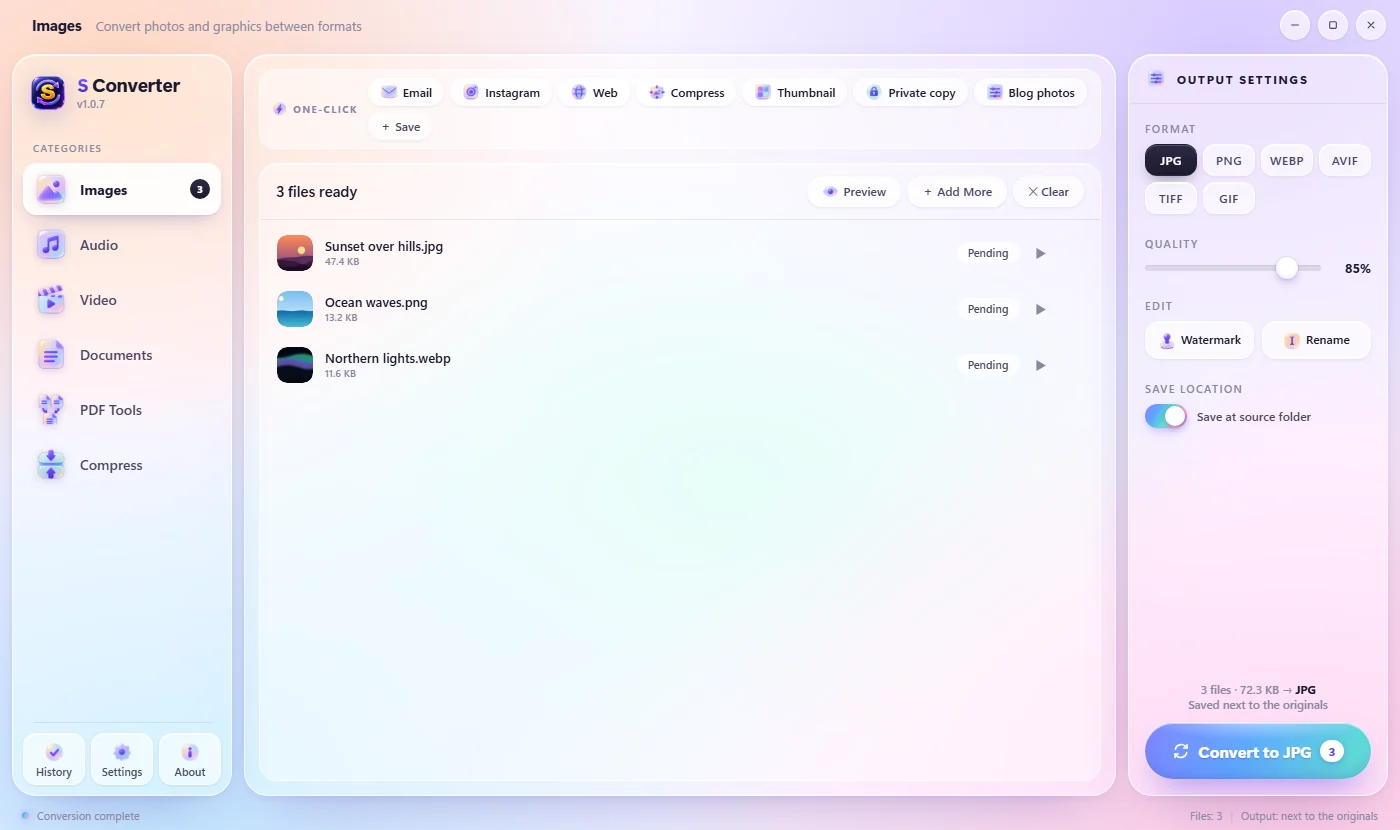
Save a preset
- Open Images, Audio, Video, Documents or Compress.
- Set things up on the right the way you like them: the format, the quality, the maximum width, a watermark.
- At the end of the One-click row, press + Save.
- Type a name, for example Blog photos, and press Enter.
Use it
Add files and press your preset in the One-click row: S Converter converts them straight away with your settings. Your presets are also on the Presets page of the Quick Convert wheel, so you can use them right from File Explorer.
Delete a preset
Point at the preset and press the small × that appears. You can keep up to 30 presets.
Good to know
Your settings, one click
Format, quality, size, resolution, bitrate and watermark are all remembered.
In the app and the wheel
Saved presets appear in both places at once.
Stays on your PC
Presets are saved with your settings, never online.
Questions
Can I change a saved preset?
Set things up the new way, save it under the same name, then delete the old one.
Why is the Save button missing?
Presets can be saved for Images, Audio, Video, Documents and Compress. PDF Tools have their own options instead.
Keep learning
Get S Converter
Free, no ads, no account. Images, video, audio, documents, PDFs and archives, all converted on your own PC.