Tutorial · free for Windows 10 and 11
Add a watermark to photos and videos
Protect your photos and videos before you share them. S Converter’s watermark designer shows exactly how it will look, and applies it to a whole batch.
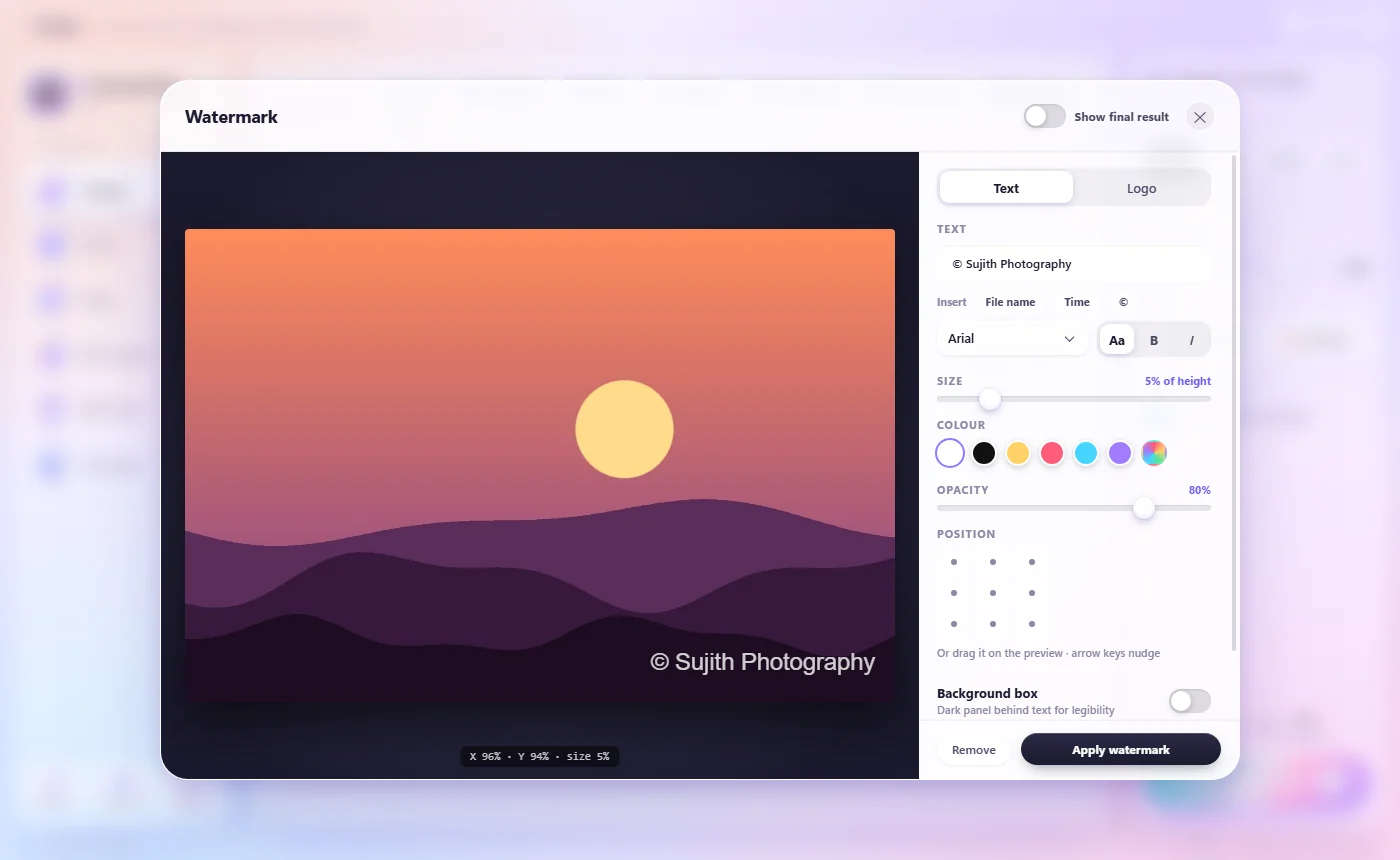
Add a watermark
- Add your photos (in Images or Compress) or videos (in Video).
- Under Edit, press Watermark. The designer opens with a preview of your first file.
- Choose Text and type it, or use Insert to add the File name, the Time or a ©. Or choose Logo and pick an image (a PNG with a transparent background looks best).
- Set the font, Size, Colour and Opacity. Click a spot in Position, or drag the watermark on the preview; arrow keys nudge it.
- Press Apply watermark, then Convert.
Make it easy to read
Switch on Background box for a dark panel behind the text, and turn on Show final result to see it exactly as it will be saved. Remove takes the watermark off again. Your design is remembered for next time.
Good to know
Sized to every photo
Size is a share of the picture’s height, so it looks the same on small and large files.
Photos and videos
The same design works on both.
Batch it
One design, a whole folder watermarked.
Questions
Can I add my logo instead of text?
Yes. Choose Logo in the designer and pick an image file.
Does the watermark change my original files?
No. It’s added to the new converted copies only.
Can I put the file name on each photo?
Yes. Insert File name, and every photo gets its own name.
Keep learning
Get S Converter
Free, no ads, no account. Images, video, audio, documents, PDFs and archives, all converted on your own PC.